


Want to accept payments directly on your WordPress website without building a full online store? A Stripe payment form can give visitors a straightforward way to pay for a service, product, booking, or other one-time purchase. In this guide, you’ll learn how to create a Stripe payment form in WordPress using Easy Stripe Payments & Donations, connect your Stripe account, place the form on a page, and test the checkout before accepting real payments.
Rather than covering every possible WordPress payment setup, we’ll focus on one practical outcome: getting a working payment form onto a page. If you’re still deciding how to accept Stripe payments without an e-commerce platform, start with our complete guide to accepting Stripe payments in WordPress.
Why Use a Stripe Payment Form in WordPress?
A payment form lets a visitor complete a specific transaction without navigating a traditional shopping cart. For a freelancer charging a fixed project fee, a small business collecting a deposit, or a creator selling a single service, this can be a simpler experience than operating a full e-commerce storefront.
Stripe handles the payment processing side of the transaction. Your WordPress website provides the page, the context, and the action that leads the visitor to pay. A dedicated WordPress payment plugin helps connect those pieces.
When is a payment form a good fit?
- Service payments: collect a fixed fee for consultations or other clearly defined services.
- Single-product payments: offer a straightforward purchase without a large product catalog.
- Event or appointment fees: collect a payment tied to a specific booking or event, provided your overall booking process supports it.
- Donations: create a payment experience for supporters; for a donation-specific walkthrough, see our guide to accepting donations in WordPress with Stripe.
If you need advanced inventory management, shipping rules, or a complex multi-product cart, evaluate those requirements separately before choosing a payment-form approach.
What You Need Before You Start
Prepare the following before creating your WordPress Stripe payment form:
- A WordPress website with administrator access.
- An active Stripe account, with any required business verification completed before accepting live payments.
- The Easy Stripe Payments & Donations plugin installed or ready to install.
- A WordPress page where you want visitors to make a payment.
- An HTTPS-enabled website, especially for a production payment flow.
Decide what the visitor is paying for, the amount to charge, and what should happen after payment. A clearly described offer makes the form easier to understand and helps reduce avoidable customer questions.
Step 1: Install Easy Stripe Payments & Donations
Install and activate the WordPress plugin
- Sign in to your WordPress admin dashboard.
- Go to Plugins > Add New Plugin.
- Search for Easy Stripe Payments & Donations.
- Confirm the plugin name and publisher, then select Install Now.
- Click Activate once installation finishes.
- Open the plugin’s settings area to begin connecting your Stripe account.
After activation, take a moment to review the available plugin settings. You’ll connect Stripe before setting up the payment experience.
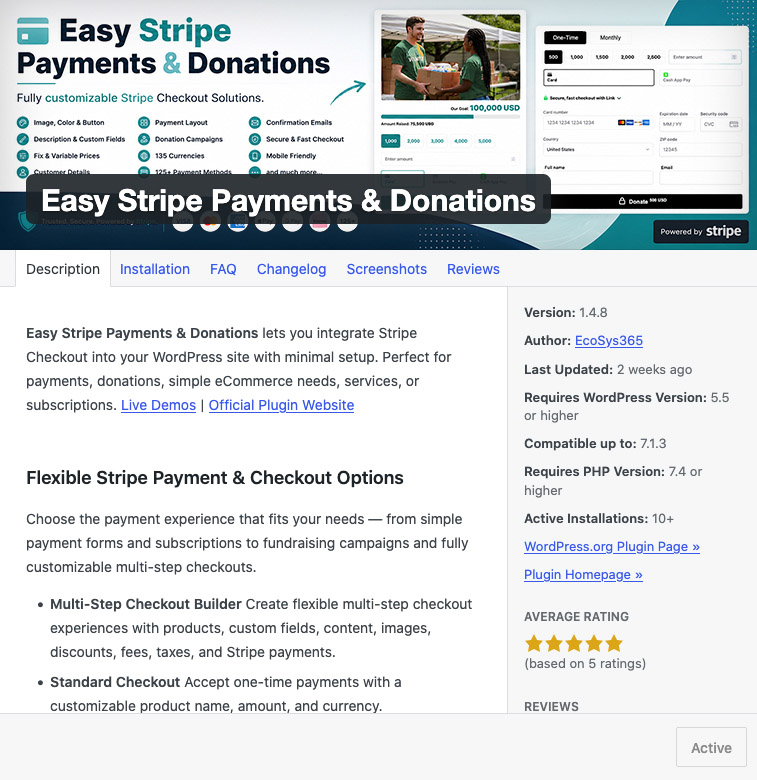 Easy Stripe Payments & Donations plugin installed and activated in WordPress.
Step 2: Connect Your Stripe Account
Easy Stripe Payments & Donations provides two distinct Stripe Connect options in its settings: Connect with Stripe (Live) and Connect with Stripe (Test). This separation is useful because you can prepare and test your payment flow without immediately processing real charges.
Start with Stripe Test Mode
- Open Easy Stripe Payments & Donations settings in WordPress.
- Find the Stripe connection options.
- Click Connect with Stripe (Test).
- Follow the Stripe Connect authorization flow shown on screen.
- Return to WordPress and verify that the test connection is established.
Important: A test connection is intended for simulated transactions. Test payments do not transfer real money. The test and live connections are separate, so do not assume a successful test connection means live payments are already enabled.
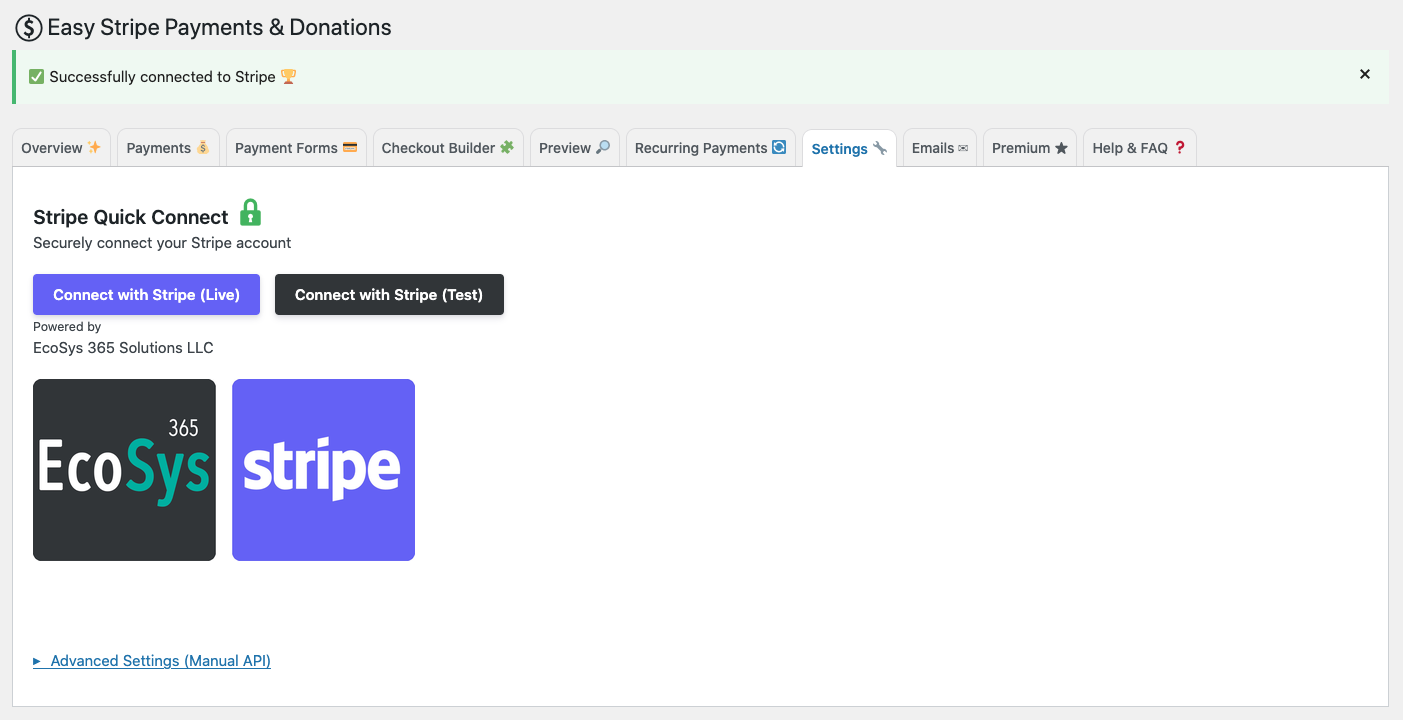 Stripe Quick Connect settings in Easy Stripe Payments & Donations, showing the options to connect a Stripe account in live or test mode.
For general background on the overall Stripe setup, you can also read how to accept Stripe payments in WordPress without WooCommerce.
Step 3: Create Your Stripe Payment Form
Now define the payment you want visitors to make. The precise field names and editor controls depend on the version of Easy Stripe Payments & Donations installed on your website, so follow the form-creation interface shown in your dashboard.
Configure the payment
- Open the plugin’s payment-form creation interface.
- Create a new payment form and give it a descriptive internal name, such as Consultation Payment.
- Set the payment amount and currency using the options available in your plugin version.
- Provide a clear description of the product or service so customers know what they are paying for.
- Review any available customer-information, confirmation, or payment settings.
- Save the form and locate the method provided by the plugin for placing it on a WordPress page.
Example: A consulting business might create a form labeled “Website Consultation” with a clearly stated one-time fee. The page should explain what the fee includes, any booking steps, and how the customer will receive confirmation.
The goal is a reliable, understandable checkout, not a form with the maximum possible number of fields.
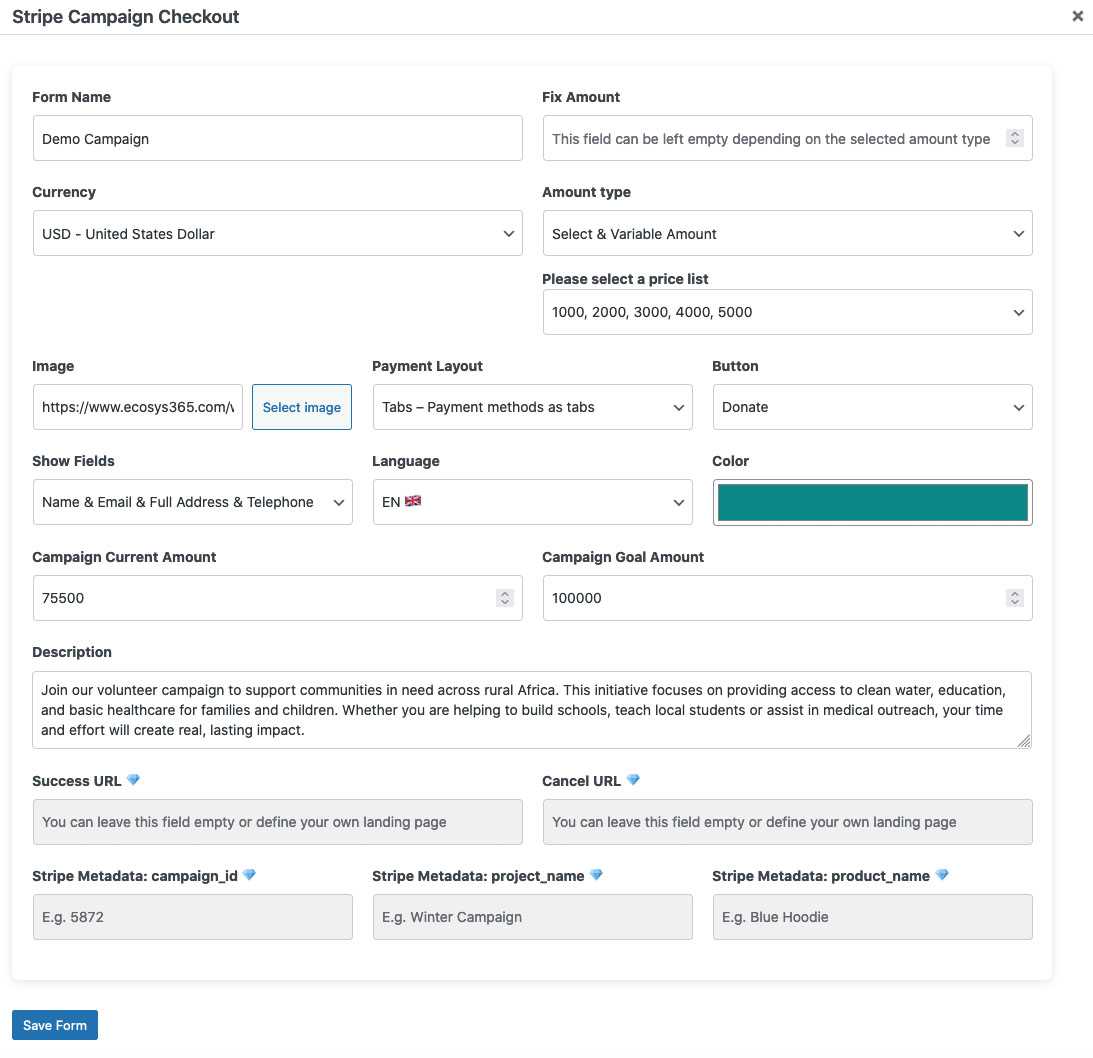 Stripe payment form settings in Easy Stripe Payments & Donations, showing customizable options for payment amounts, currency, layout, form fields, and donation campaigns.
Step 4: Add the Payment Form to a WordPress Page
Once the form is saved, it needs a public-facing location. You might place it on a dedicated “Pay Now” page, a service landing page, or a product detail page.
Publish the payment page
- Go to Pages > Add New in WordPress, or edit an existing page.
- Add a clear heading that describes the payment, such as Pay for Your Consultation.
- To display your Stripe payment form on a WordPress page, insert a Shortcode block or Elementor Shortcode widget and paste [espad_payment_form id=”1″].
- Add a brief explanation of the payment amount, what the customer receives, and any relevant refund or cancellation information.
- Preview the page on desktop and mobile.
- Publish or update the page when the form is displayed correctly.
Note: To display your Stripe payment form on a WordPress page, insert a Shortcode block or Elementor Shortcode widget and paste [espad_payment_form id=”1″]. Replace 1 with your payment form’s actual ID.
Step 5: Test Your Stripe Payment Form Before Going Live
Testing is one of the most important steps. It helps you catch missing information, incorrect amounts, layout problems, and unexpected checkout behavior before customers encounter them.
Run a complete test payment
- Confirm that the plugin is using the Stripe Test connection, not the live connection.
- Open the published payment page in a private browser window.
- Check that the form displays the expected amount, currency, and description.
- Follow the checkout process using Stripe’s supported test payment details for the payment method being tested.
- Confirm that the visitor receives the expected success or confirmation experience.
- Check the corresponding transaction in your Stripe account’s test data.
- Repeat the test on a mobile device and verify that the form remains usable.
Stripe publishes official testing guidance, including test card details and scenarios for declined payments. Use those documented test values only in test mode. Never use a real card to simulate a test transaction.
What should you check?
- The payment page loads without errors or broken styling.
- The correct payment amount and currency appear before checkout.
- The payment flow behaves as expected after success and failure.
- Test transactions appear in the appropriate Stripe test environment.
- Confirmation messaging tells the customer what happens next.
- The payment experience works on mobile screens.
Step 6: Connect Stripe Live and Accept Real Payments
When your test payments work correctly, prepare your production setup. In the plugin settings, the separate Connect with Stripe (Live) button is used for the live Stripe connection.
Production launch checklist
- Make sure your Stripe account is ready to process live payments.
- In the plugin settings, select Connect with Stripe (Live).
- Complete the Stripe Connect authorization steps.
- Verify that the plugin is configured to use the live connection for the published payment form.
- Recheck the amount, currency, page content, and customer-facing instructions.
- Confirm that the production payment flow is accessible and behaves as expected.
Important: Test-mode transactions are not live transactions. Connecting in live mode does not convert old test payments into real charges. Verify the active connection before sharing your payment page with customers.
If you decide to perform a real low-value transaction to validate the live setup, remember that real charges, processing fees, and refund implications may apply.
How to Make Your WordPress Payment Form More Effective
A technically functional form is only part of the job. Visitors also need enough confidence and context to complete a payment.
Keep the purpose of the payment obvious
Use a heading that tells visitors exactly what they are paying for. Place the price and currency close to the form, and explain what happens after the payment succeeds. Avoid vague labels such as “Submit” when a clearer payment-related action is available.
Make the page mobile-friendly
Test on smaller screens. Text should remain readable, form controls should be easy to tap, and no important payment information should disappear off-screen. A payment form that works only on desktop can create unnecessary friction.
Build trust with useful information
Include your business name, an accessible contact method, and links to applicable refund, privacy, or service terms. Make only accurate security and compliance claims; Stripe’s role in processing payments does not remove every responsibility from the website operator.
Use a focused call to action
A dedicated payment page should have one primary goal. Reduce unrelated distractions, but keep essential details visible so customers can make an informed decision.
Troubleshooting Common Stripe Payment Form Problems
The payment form does not appear
Confirm that the form was saved, that the correct insertion method was used, and that the page is published. If the editor displays shortcode text instead of a form, check whether the shortcode matches the one generated by your plugin version. Also inspect caching or optimization plugins if the issue appears only on the public page.
The Stripe connection is missing or incomplete
Return to the plugin settings and review the connection status. Make sure you completed the Stripe Connect authorization flow for the intended environment. Remember that Connect with Stripe (Test) and Connect with Stripe (Live) are separate actions.
A test payment fails
Verify that you are using Stripe’s supported test data in the test environment. Some test payment details are designed to simulate declined or unsuccessful payments, so a failure may be expected. Check the related test transaction and any available error details before changing your setup.
The page works on desktop but not mobile
Preview the page with your active theme and page builder. Check for narrow containers, overlapping elements, JavaScript errors, or aggressive performance settings that interfere with the form.
Payment succeeds but the customer is confused
Review your confirmation text and any follow-up process. Customers should understand whether they will receive an email, access to a service, a booking confirmation, or another next step. Test this entire experience rather than only the payment itself.
Frequently Asked Questions
Can I create a Stripe payment form in WordPress without WooCommerce?
Yes. A dedicated Stripe payment plugin can be an alternative when you need a focused payment form rather than a full online store. Read our WordPress Stripe payments guide for a broader explanation of this approach.
Can I test a payment form without charging real money?
Yes. Easy Stripe Payments & Donations provides a Connect with Stripe (Test) option in its settings. Use Stripe’s supported test payment data to check your checkout before switching to live processing.
What is the difference between Connect with Stripe (Test) and Connect with Stripe (Live)?
The test connection is for simulated payments, while the live connection is for real transactions. The plugin provides separate buttons for these two Stripe Connect flows, so verify which environment is active before testing or publishing.
Where should I place my payment form?
Place it where the visitor has enough context to pay confidently. A dedicated payment page or a service-specific landing page is often easier to understand than an unrelated general-purpose page.
Can I use Stripe to accept donations in WordPress?
Yes. For a donation-focused setup and additional considerations for fundraising pages, see How to Accept Donations in WordPress with Stripe.
Do I need HTTPS for a WordPress payment page?
You should use HTTPS for a live payment website. It helps protect data exchanged with your site and is an essential part of a trustworthy production setup, although HTTPS alone does not guarantee complete payment security.
Final Checklist: Your First WordPress Stripe Payment Form
You do not need to turn every payment page into a complicated online store. With a focused WordPress payment plugin and a clear setup process, you can create a page built around a specific transaction.
- Install and activate Easy Stripe Payments & Donations.
- Connect your Stripe account in Test mode first.
- Create a payment form with a clear purpose, amount, and currency.
- Insert the form into the appropriate WordPress page.
- Test the full payment and confirmation experience.
- Connect Stripe in Live mode and verify your production settings before launch.
If your next project involves fundraising rather than a standard payment, continue with our step-by-step Stripe donations guide for WordPress.