
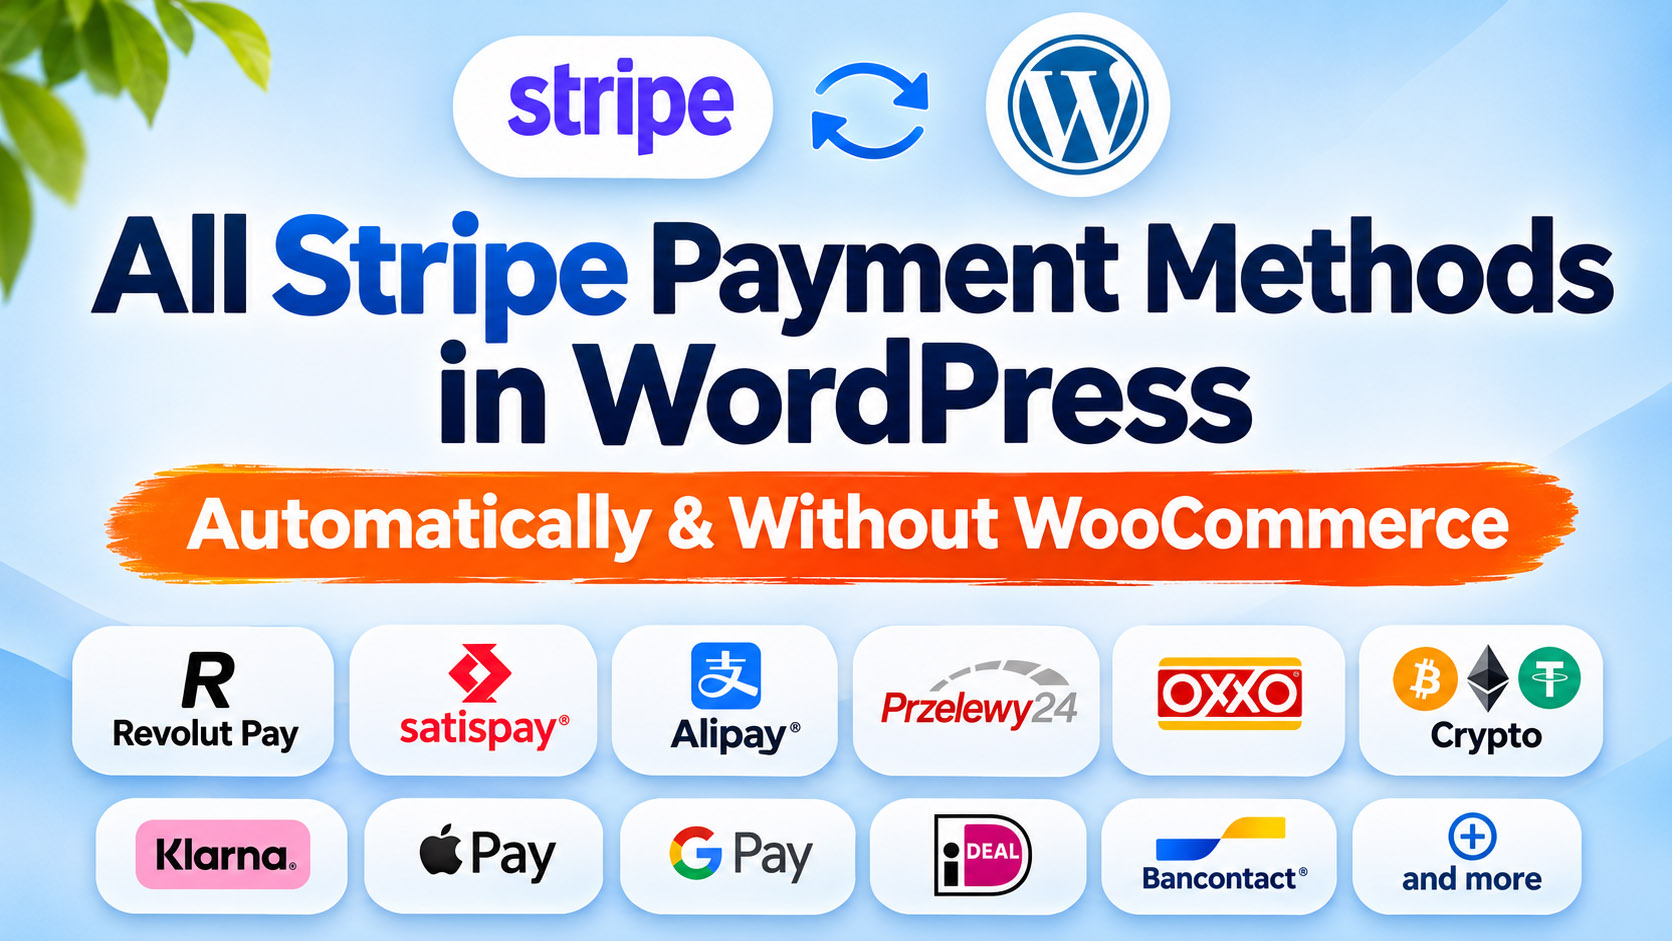
Want to accept Revolut Pay, Satispay, Alipay, Przelewy24, OXXO, digital wallets, and other Stripe payment methods on your WordPress website? You do not need to build a separate integration for every option. With Easy Stripe Payments & Donations, you can manage your preferred payment methods in the Stripe Dashboard and make eligible options available automatically across your WordPress checkout experiences, including multi-step checkout.
Offering familiar payment methods can make paying more convenient for customers in different countries. A buyer in Poland might look for Przelewy24, while a customer in Italy may prefer Satispay. For a WordPress website owner, however, supporting multiple payment options should not mean maintaining multiple payment plugins.
This guide explains how Stripe’s dynamic payment methods work, which popular options you can offer, how to configure them in WordPress without WooCommerce, and why certain methods may not appear for every customer.
Why Payment Method Choice Matters for WordPress Websites
Credit and debit cards remain important, but they are not the only way people prefer to pay online. Depending on the market, customers may expect a bank-based payment method, a mobile wallet, a buy now, pay later option, or a cash voucher.
For example, a service provider selling internationally may want to reach customers using Revolut Pay or Alipay. A nonprofit collecting contributions from different countries may benefit from presenting locally familiar options when Stripe makes them eligible for the transaction.
There are practical benefits to giving customers appropriate choices:
- Local familiarity: Customers can recognize payment services they already use.
- More convenient checkout: Eligible wallets and bank-based methods may reduce the need to enter card details manually.
- International reach: A single WordPress payment experience can serve customers with different regional preferences.
- Less manual administration: Centralized payment-method management avoids maintaining separate WordPress configurations for each method.
More payment options do not guarantee more sales. The goal is to show the right options for the customer, currency, location, and type of purchase.
How Stripe Automatically Manages Payment Methods
Stripe supports dynamic payment methods: rather than hard-coding a fixed list into every checkout, an eligible integration can use Stripe’s configuration and eligibility rules to determine which payment options to display.
In the Stripe Dashboard payment method settings, merchants can review and manage available methods. Stripe then evaluates factors such as merchant eligibility, customer location, payment currency, and transaction characteristics.
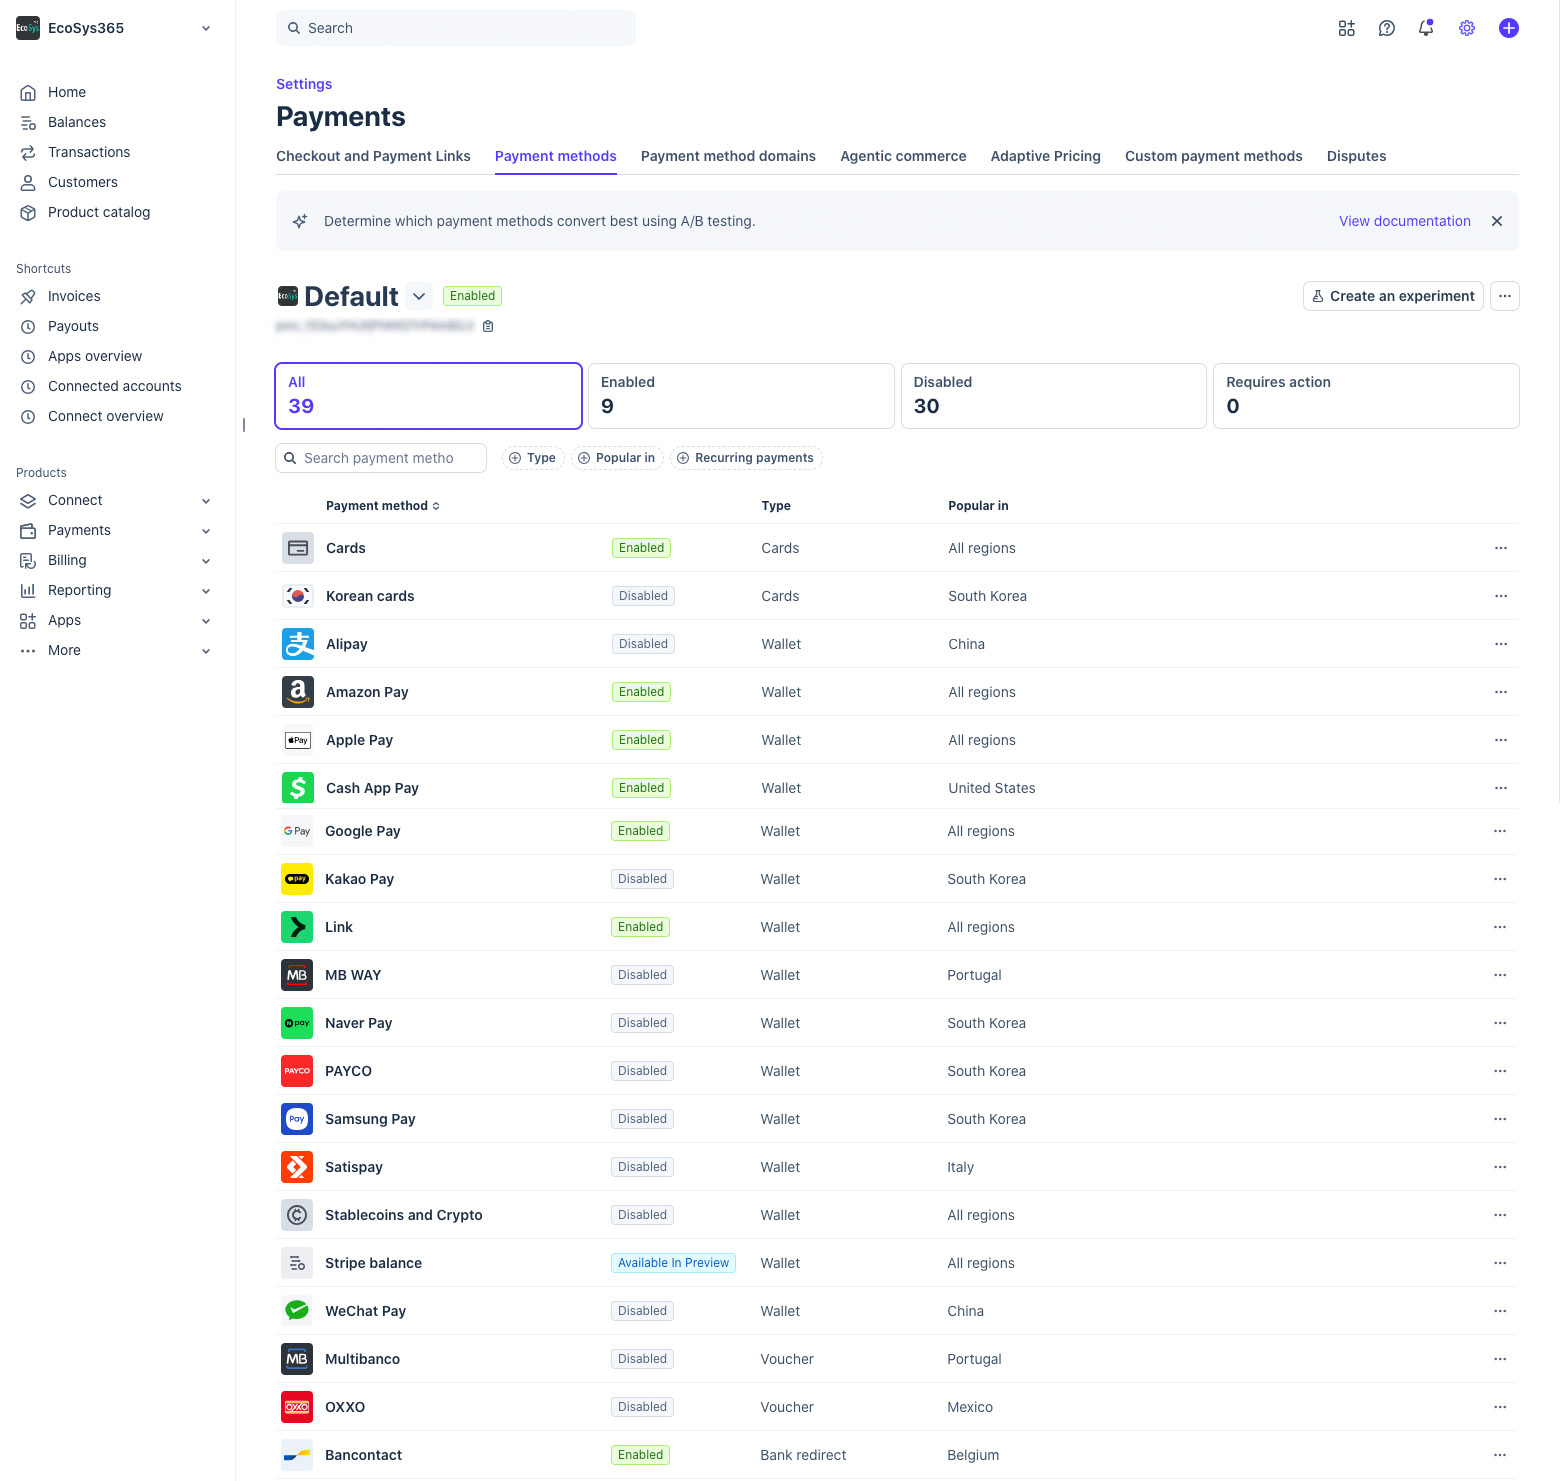
One dashboard, multiple payment options
With Easy Stripe Payments & Donations, you can enable or disable your preferred methods in Stripe instead of configuring each one separately inside WordPress. When a method is eligible for the specific payment, the plugin’s Stripe-powered checkout can display it automatically.
This approach applies to the plugin’s checkout variants, including its multi-step checkout builder. It does not mean that every method will be visible for every payment: Stripe still controls eligibility, and some methods support only particular payment flows.
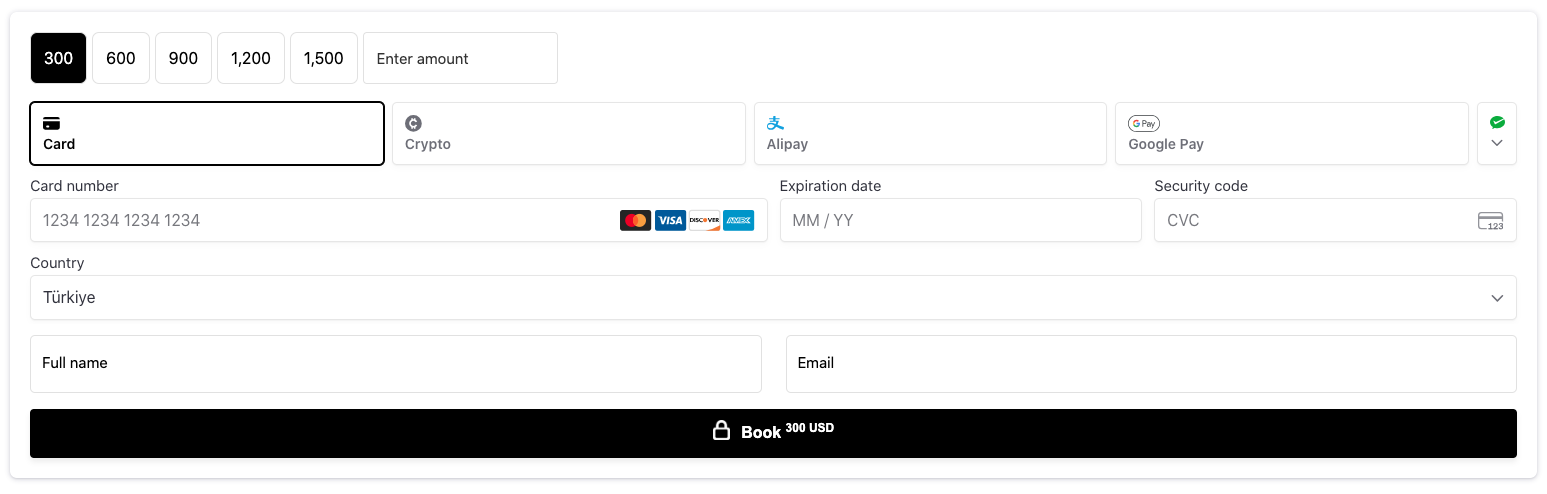
Automatic does not mean universally available
For instance, a payment method suitable for a one-time purchase may not support recurring subscription charges. Some options also require account approval or are limited to merchants in specific countries. That is why an accurate claim is automatic display of eligible, enabled Stripe payment methods, not a promise that every Stripe method appears in every situation.
For more background, see Stripe’s documentation on dynamic payment methods.
Popular Stripe Payment Methods You Can Accept in WordPress
The following examples illustrate the range of payment experiences available through Stripe. Availability depends on your Stripe account, supported regions, currencies, checkout configuration, and the individual method’s requirements. They are also useful starting points for choosing which markets to serve.
Revolut Pay
Revolut Pay allows eligible customers to pay using their Revolut experience. It is particularly relevant to businesses serving customers familiar with Revolut, including audiences across Europe. If Stripe makes Revolut Pay available to your account and transaction, you can enable it in the Stripe Dashboard and let the eligible option appear in your WordPress checkout. This can be useful for consultants, digital service providers, and other businesses that want an alternative to card-only checkout.
Satispay
Satispay is a mobile payment service with a strong connection to the Italian market. For businesses and organizations with customers or supporters in Italy, it may be a familiar way to pay. With a dynamic Stripe integration, there is no need to create an entirely separate Satispay checkout form in WordPress. First confirm that Stripe offers the method for your merchant account and transaction, then manage its activation through Stripe.
Alipay
Alipay is an important digital wallet for reaching customers who use Chinese payment services. It can be relevant to tourism businesses, educational providers, international merchants, and websites serving visitors from China. Alipay eligibility is not determined simply by enabling a switch: Stripe also evaluates the merchant and payment context. Once enabled and eligible, Alipay can be presented alongside other available payment options in the same WordPress checkout.
Przelewy24 (P24)
Przelewy24, often abbreviated to P24, is a popular online payment option in Poland. It gives customers access to familiar local payment flows, making it especially relevant for businesses targeting Polish buyers. Rather than developing a separate P24 integration, a WordPress site using Easy Stripe Payments & Donations can rely on Stripe’s supported payment-method configuration. Check supported currencies and payment flows before launching a Polish-market checkout.
OXXO
OXXO is a cash-based payment method associated with Mexico. Instead of completing the payment instantly with a card, the customer receives payment instructions or a voucher and pays through a participating OXXO location. This makes OXXO different from an instant digital wallet: the payment can remain pending until the cash transaction is confirmed. Merchants must not treat voucher creation as proof of payment. OXXO is especially relevant for eligible one-time purchases, not as a universal solution for recurring billing.
Crypto and Stablecoin Payments
Crypto payments through Stripe require special attention because the term can refer to different Stripe products. Stripe’s stablecoin payment offering can let eligible customers pay using supported crypto wallets and stablecoins, with the merchant receiving settlement in the supported fiat currency, such as USD. This is not the same thing as accepting every cryptocurrency directly into a personal wallet.
Stablecoin payments have additional merchant eligibility, geographic, currency, and product restrictions. At the time of writing, Stripe’s stablecoin acceptance has been focused on eligible US businesses, and it should not be assumed to work with subscriptions or every checkout integration. Stripe’s crypto onramp and crypto payout products also serve different purposes from customer checkout payments.
Before advertising crypto acceptance on your WordPress website, confirm that your Stripe account is approved for the specific stablecoin payment product and test the exact checkout variant you intend to use. Review Stripe’s stablecoin payments documentation for current requirements.
Apple Pay, Google Pay, and Link
Apple Pay and Google Pay help eligible customers complete purchases using supported devices and wallets. Link is Stripe’s accelerated checkout experience for customers who choose to save and reuse payment information. Their appearance can depend on device, browser, domain verification, customer setup, and Stripe eligibility. These are useful options for mobile-friendly WordPress payment pages.
Klarna and Other Buy Now, Pay Later Methods
Klarna and other buy now, pay later methods can give eligible customers alternative ways to pay for qualifying purchases. They may be relevant for higher-value services or products, but supported transaction amounts, countries, currencies, and business categories vary. Do not assume that an installment option can be used for every subscription or donation.
iDEAL, Bancontact, and Other Regional Methods
iDEAL is associated with payments in the Netherlands, while Bancontact is widely recognized in Belgium. Other Stripe-supported options may include BLIK, Pix, SEPA Direct Debit, and region-specific bank payment methods. The best combination depends on where your customers live and how they prefer to pay. Instead of publishing an exhaustive static list that may become outdated, use the Stripe Dashboard as your source of currently available methods.
How to Enable Stripe Payment Methods in WordPress: Step by Step
You can use Easy Stripe Payments & Donations without installing WooCommerce. The setup connects WordPress to Stripe, creates a checkout, and leaves payment-method eligibility and activation under Stripe’s management.
Step 1: Install Easy Stripe Payments & Donations
- Open your WordPress administration dashboard.
- Navigate to Plugins > Add New Plugin.
- Search for Easy Stripe Payments & Donations.
- Install and activate the plugin published by EcoSys365.
You can also find the plugin on its official WordPress.org listing. If you are new to accepting online payments, start with our broader guide to accepting Stripe payments in WordPress.
Step 2: Connect Your Stripe Account
- In WordPress, open Stripe Payments > Settings.
- Choose the available Connect with Stripe option for the appropriate live or test environment.
- Follow Stripe’s authorization process to connect your account.
- Confirm that the correct Stripe account and mode are connected before creating a live checkout.
Connecting the correct account matters because payment-method settings are managed in Stripe, not independently in every WordPress form.
Step 3: Enable Your Preferred Methods in Stripe
- Sign in to your Stripe Dashboard.
- Open the payment-method settings for the relevant account or configuration.
- Review available options such as Revolut Pay, Satispay, Alipay, or Przelewy24.
- Enable the methods you want to offer and complete any required activation or verification steps.
- Check whether each method supports your business country, currency, and intended payment type.
Dashboard labels and approval requirements can change. A method that is unavailable or awaiting approval cannot be made available simply by changing a WordPress setting.
Step 4: Create Your WordPress Checkout
Return to the plugin’s payment forms area and create a checkout appropriate for your use case. You might use a standard payment form for a service, a campaign checkout for fundraising, or a multi-step checkout for a more guided purchase experience.
- Choose the checkout type.
- Configure the product, service, donation, or subscription details.
- Set the amount and currency, and add any relevant fields.
- Save the checkout and use its generated shortcode to embed it on your WordPress page.
For a more detailed introduction to form creation, read how to create a Stripe payment form in WordPress.
Step 5: Preview the Automatically Available Payment Methods
Open the page containing your checkout and inspect the Stripe payment section. Eligible payment methods enabled in your Stripe account can be displayed automatically, without a separate per-method setup inside the plugin.
For example, if Revolut Pay and Alipay are enabled and eligible for a particular transaction, they may appear alongside card payments. If a method is not eligible, Stripe may omit it even though it is enabled in the Dashboard.
Important: Switching payment methods in Stripe does not override country restrictions, unsupported currencies, subscription limitations, or other Stripe rules.
Step 6: Test the Complete Payment Experience
Use Stripe’s test environment where the relevant payment method supports testing. Confirm the method is displayed, follow the complete customer journey, and verify the resulting payment status in Stripe.
Some payment methods use delayed confirmation or redirect flows, so a successful-looking checkout screen is not always the same as a completed payment. Follow our detailed guide on testing Stripe payments in WordPress before going live.
Automatic Stripe Payment Methods Across Different Checkout Types
One of the practical advantages of Easy Stripe Payments & Donations is that the Stripe Dashboard remains the central place for managing eligible payment methods across the plugin’s checkout experiences. This includes its multi-step checkout builder, not just a basic payment form.
Standard Checkout
Accept a one-time payment for a product or service using a straightforward checkout. Eligible Stripe payment methods can appear based on the configured transaction.
Advanced Checkout
Build a more flexible payment experience with different pricing or payment options. Stripe’s method eligibility still depends on the actual payment flow, particularly when recurring payments are involved.
Subscription Checkout and Subscription Button
Subscriptions require methods that support recurring billing and the specific Stripe integration. Although the plugin follows Stripe’s enabled-method configuration, a one-time-only method such as OXXO should not be expected to appear for recurring subscription charges. Learn more in our guide to adding a Stripe subscription button to WordPress.
Campaign Checkout
Fundraising campaigns can offer eligible payment choices for one-time contributions. If your organization collects donations, see our related article on accepting donations in WordPress with Stripe.
Multi-Step Checkout Builder
A multi-step checkout can collect product selections, customer details, custom fields, or donation amounts before reaching the payment step. With Easy Stripe Payments & Donations, the eligible methods managed in Stripe also carry through to this checkout experience. That means you can design a more guided purchase flow without separately rebuilding your list of payment methods for the final payment step.
The exact options still depend on Stripe’s requirements for the final amount, currency, merchant, and payment type.
Why Some Stripe Payment Methods May Not Appear
Enabling a payment method in the Stripe Dashboard does not guarantee that every visitor will see it. Stripe dynamically determines which methods are eligible. If an option is missing, investigate these common causes before changing your WordPress checkout.
- Merchant location: Some payment methods are available only to businesses registered in supported countries.
- Customer location: A regional method may be relevant only to customers in certain locations.
- Currency: Some methods require particular transaction currencies.
- One-time versus recurring: A method that works for a single purchase may not support subscription renewals.
- Account approval: Certain methods require onboarding, verification, or access approval.
- Device and browser: Wallets may appear only when the customer’s environment supports them.
- Payment configuration: Different Stripe payment-method configurations or test/live environments may produce different results.
- Delayed payment flows: Voucher and bank-based methods may require asynchronous payment confirmation.
If a method is absent, start by reviewing its status and requirements in Stripe. Then test the exact WordPress checkout with a supported currency and realistic transaction details. Avoid assuming that a missing option is necessarily a plugin error.
How to Test Regional and Alternative Payment Methods Before Launch
Testing matters even more when your checkout supports methods beyond cards. Different payment methods can involve redirects, external authentication, delayed settlement, or a voucher that customers must pay later.
- Check eligibility first. Verify the method is available to your Stripe account and the intended payment type.
- Use the correct environment. Make sure your WordPress plugin and Stripe Dashboard are both configured for the intended test or live mode.
- Test display conditions. Confirm that the method appears for supported transaction details.
- Complete the entire flow. Follow any redirect, wallet confirmation, or voucher instructions supported in testing.
- Verify payment status. Confirm success, pending, or failure using Stripe’s authoritative payment records.
- Test mobile usability. Review the experience on smaller screens, particularly for wallet and multi-step checkout flows.
For OXXO and other delayed-confirmation methods, do not fulfill an order merely because payment instructions were generated. Wait for the appropriate successful payment confirmation. For crypto or stablecoin acceptance, verify actual account access and checkout compatibility rather than relying on a generic method list.
Best Practices for Offering Multiple Stripe Payment Methods
Choose methods based on your customers
A business serving Polish customers might prioritize P24, while a website serving customers in Italy might evaluate Satispay. Start with your actual audience rather than enabling every possible method without a reason.
Keep payment management centralized
Use Stripe’s payment-method settings as your operational source of truth. This reduces unnecessary configuration work when you create new WordPress forms or update existing checkout experiences.
Separate one-time and recurring payment requirements
Not every payment method can collect recurring subscription charges. Review Stripe’s support for renewals before choosing methods for memberships, recurring donations, or subscription products.
Communicate delayed payment confirmation clearly
For cash vouchers and some bank-based payment methods, customers may need to complete an additional step after leaving your website. Explain what happens next, and avoid promising instant fulfillment before Stripe confirms payment.
Review availability regularly
Stripe’s supported methods, geographic coverage, and eligibility requirements can change. Revisit your account settings and test important checkout paths periodically, especially when entering a new market.
Frequently Asked Questions About Stripe Payment Methods in WordPress
Can I accept Stripe payment methods in WordPress without WooCommerce?
Yes. Easy Stripe Payments & Donations works as a standalone WordPress plugin. You can create payment forms and checkout experiences without installing WooCommerce.
Do I need a separate WordPress plugin for Revolut Pay or Satispay?
Not when the method is available through your eligible Stripe configuration and supported by the checkout. Easy Stripe Payments & Donations uses Stripe-managed payment methods, so you do not need a separate WordPress plugin for each eligible option.
Can I accept Alipay and Przelewy24 in the same WordPress checkout?
Potentially, yes. If both methods are enabled and eligible for the merchant, transaction, and payment flow, Stripe can make them available through the same checkout. Their appearance may differ between customers and currencies.
How do I enable OXXO payments in WordPress?
First confirm OXXO availability and eligibility in your Stripe account. Enable it where supported, then test an appropriate one-time checkout. OXXO is a cash voucher payment method, so payment completion may be delayed until the customer pays the voucher.
Can I accept cryptocurrency or stablecoins with Stripe in WordPress?
Stripe offers stablecoin-related payment products for eligible businesses, but availability is restricted and product-specific. Do not assume that a generic Stripe integration automatically supports crypto acceptance. Confirm account approval, supported currency, and the exact checkout integration before offering it to customers.
Will enabled Stripe payment methods appear in multi-step checkout?
Easy Stripe Payments & Donations supports Stripe-managed payment methods across its checkout variants, including the multi-step checkout builder. Stripe still determines which enabled methods are eligible for each transaction.
Why is an enabled payment method missing from my checkout?
Common reasons include country or currency restrictions, unsupported recurring billing, account approval requirements, device limitations, and differences between Stripe test and live configurations. Check Stripe’s method-specific requirements first.
Can customers use every Stripe payment method for subscriptions?
No. Recurring payments require methods that support the relevant subscription flow. Some regional methods, cash vouchers, and stablecoin payment products are not suitable for recurring billing.
Do I need to update my WordPress payment form every time I enable a new method?
Normally, no separate per-method WordPress configuration is needed with Easy Stripe Payments & Donations. Enable the method in Stripe, satisfy its requirements, and verify that it appears for an eligible checkout transaction.